Introduction
Many yoga poses provide a variety of health benefits, such as increased flexibility and stress reduction. One such stance is the “hand-to-foot pose,” or Padahastasana. It makes sense that this pose is the cornerstone of many yoga practices. It relieves tension and calms the mind, in addition to stretching the spine, calves, and hamstrings. This post will give you a step-by-step tutorial on how to perform Padahastasana, as well as information on its advantages and crucial pointers for a secure and efficient practice.
The advantages of Padahastasana
- Enhanced Flexibility: Because padahastasana stretches the hamstrings, calves, and spine, it is a great posture for anyone looking to flex their muscles more generally.
- Relaxation and Stress Relief: By encouraging deliberate, deep breathing, this pose helps to activate the parasympathetic nervous system, which in turn promotes relaxation and stress relief.
- Core Strengthening: Padahastasana helps to strengthen the abdominal muscles, which improves posture and overall core stability by using the core muscles to maintain balance.
- Energy Boost: During Padahastasana, the brain receives more blood, enhancing mental acuity and providing an energy boost.
- Supporting Healthy Digestion and Elimination: Padahastasana’s deep forward bend activates the digestive tract.
Step-by-Step Instructions for Padahastasana
- Begin in Mountain Pose (Tadasana): Take a tall stance, place your feet hip-width apart, and plant your feet to ground yourself. Squeeze your shoulder blades down your back while using your core.
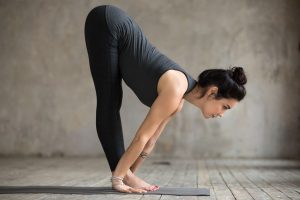
- Breathe out, bending forward from the hips while maintaining a straight spine. Lean forward with your torso and let go of any neck tension.
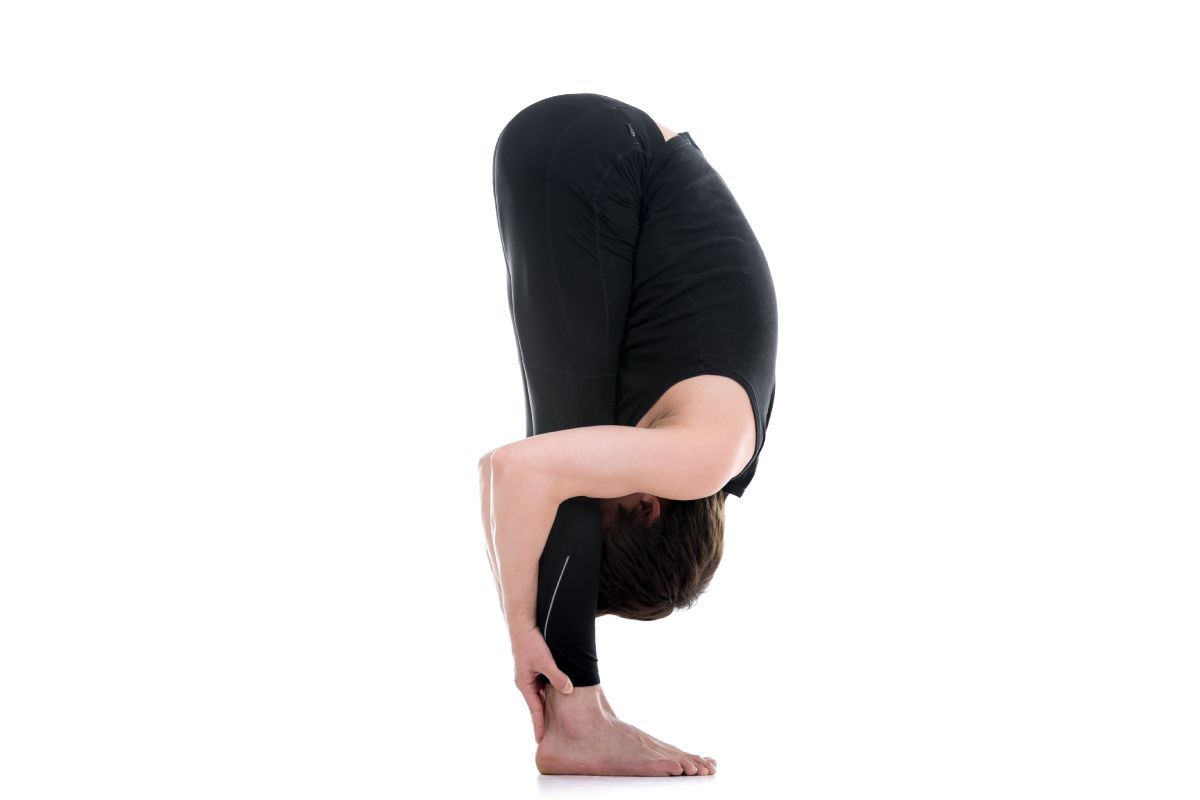
- Place Your Hands Under Your Feet: Once you have bent as far as you can comfortably, place your hands under your feet, with your fingers pointing towards your toes. If you cannot reach your feet, you can use a strap or a towel to help bridge the gap.
- Engage Your Core: Draw your navel towards your spine to engage your core muscles, which will help you maintain balance and stability in the pose.
- Lift Your Sitting Bones: As you engage your core, lift your sitting bones towards the ceiling, creating a gentle curve in your lower back.
- Hold and Breathe: Hold the pose for several breaths, focusing on deep and mindful breathing. Gradually increase the duration of your holds as you become more comfortable in the pose.
- Release and Repeat: To release the pose, gently bend your knees and roll up to a standing position, one vertebra at a time. Repeat the pose 2-3 times, taking breaks in between if needed.
Tips for a Safe and Effective Practice
- Warm Up: Before practising Padahastasana, warm up your body with some gentle stretches and movements. This will help prepare your muscles and joints for the deeper stretch of the pose.
- Use Props: If you find it challenging to reach your feet, use a strap or a towel to help bridge the gap. This will allow you to maintain the integrity of the pose while still receiving its benefits.
- Engage Your Core: Engaging your core is crucial in Padahastasana to protect your lower back and maintain balance. Be mindful of your core engagement throughout the pose.
- Listen to Your Body: Never force yourself into a pose, especially if it causes discomfort or pain. Respect your body’s limits and modify the pose as needed.
- Breathe: Focus on deep and mindful breathing throughout the pose, which will help to activate the parasympathetic nervous system and promote relaxation.
Conclusion
Strong yoga position padahastasana has several advantages, including increased flexibility and strength in the core, release from tension, and an increase in energy. Padahastasana can be a rejuvenating and transforming yoga pose, and it is a part of Surya-namaskar that you can do asana for yourself by following our detailed guide. To get optimal results, warm up, utilize props if necessary, engage your core, pay attention to your body, and maintain deep breathing throughout the position. Have fun with your practice!